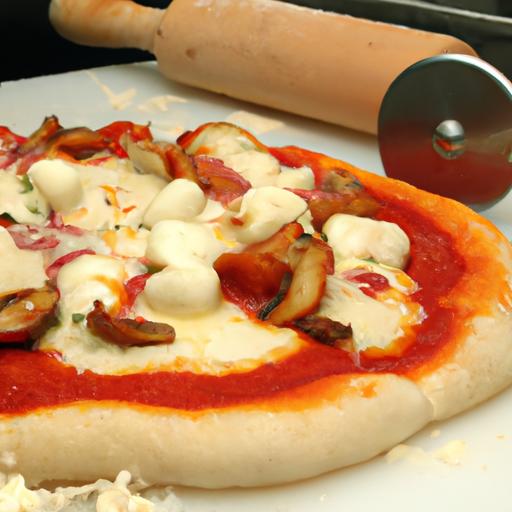
There’s something undeniably magical about a perfectly crafted pizza crust-the golden, crisp edges giving way to a tender, chewy center, a canvas ready to be adorned with yoru favorite toppings. But behind every great pizza lies one essential secret: the dough. Whether you’re a seasoned chef or a kitchen novice, mastering homemade pizza dough is the first step to transforming your pie from ordinary to extraordinary. In this ultimate guide,we’ll unravel the art and science of dough-making,sharing tips,tricks,and foolproof recipes to help you create the perfect base for your pizza masterpieces. Get ready to roll up your sleeves and embark on a doughy adventure that will elevate your homemade pizzas to pizzeria-worthy heights.
Perfect Your Pie: The Ultimate Guide to Homemade Pizza Dough unlocks the secrets behind achieving that elusive balance of a fluffy yet crispy crust that every pizza lover craves. Whether your ideal pizza crust boasts an airy, tender interior or a satisfying crunch on the edge, understanding the science of your ingredients and techniques will elevate your homemade pie from good to unforgettable.
Prep and Cook Time
- Preparation Time: 20 minutes
- fermentation Time: 1 to 24 hours (depending on preferred method)
- Baking Time: 8-12 minutes
- Total Time: Approximately 2 hours (active and inactive time combined)
Yield
- Makes 2 large (12-inch) pizza crusts
- Serves 4-6 people
Difficulty Level
- Medium – ideal for cooks ready to level up basic dough-making skills
Ingredients
- 3 ½ cups (440g) bread flour, sifted (for higher gluten and chew)
- 1 ½ cups (360ml) lukewarm water (around 110°F/43°C)
- 2 tsp active dry yeast
- 1 tbsp granulated sugar (helps activate yeast)
- 2 tsp fine sea salt
- 2 tbsp extra virgin olive oil, plus more for greasing
Instructions
- Activate yeast: In a small bowl, dissolve sugar in lukewarm water. Sprinkle the yeast evenly over the surface. let it stand 5-7 minutes untill foamy, indicating the yeast is alive and active.
- Mix dry ingredients: In a large bowl, whisk together the bread flour and sea salt, ensuring even distribution.
- Add liquids: Pour the yeast mixture and olive oil into the flour. Mix with a wooden spoon or your hand until the dough begins to form a rough ball.
- Knead the dough: Transfer dough to a lightly floured surface. Knead vigorously for 8-10 minutes until it’s smooth, elastic, and slightly tacky but not sticky. (Tip: Stretch a small piece; if it forms a thin membrane without tearing,your gluten is developed.)
- first fermentation: Lightly grease a clean bowl with olive oil, shape dough into a ball, and place it inside. Cover with plastic wrap or damp cloth. Let rise at room temperature for 1-2 hours until doubled in size. For deeper flavor, refrigerate for up to 24 hours; remove an hour before baking to come back to room temperature.
- shape the dough: Gently punch down the dough to release excess gas. Divide into two equal parts. On a floured surface, stretch or roll each ball into a 12-inch circle. For a puffy crust edge, leave a slightly thicker border around the rim.
- Preheat the oven: Place a pizza stone or inverted baking sheet in the oven and heat to 500°F (260°C) for at least 45 minutes for a blaze-hot surface that crisps the crust instantly.
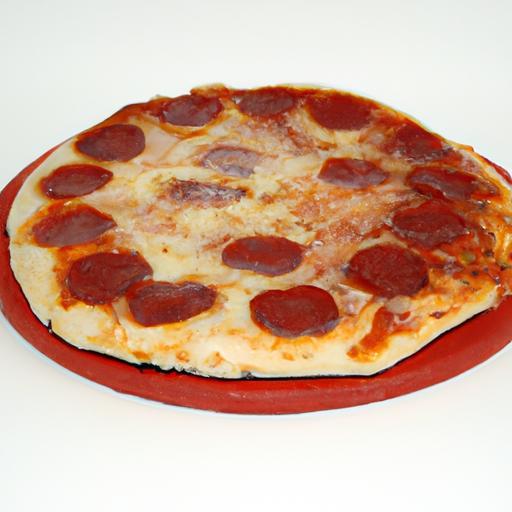
- Top and bake: Add toppings sparingly to avoid sogginess. Slide the pizza onto the stone using a peel or parchment paper. Bake 8-12 minutes until crust is golden brown and blistered, and cheese or sauce bubbles.
- Cool briefly: Remove pizza and let it rest 2 minutes before slicing to allow crust to finish crisping.
Tips for Success
- Flour choice: Bread flour’s high protein content (gluten) forms the stretchy network that traps air during fermentation, producing that perfect fluffy interior. For lighter results, experiment by mixing with Italian Tipo 00 flour.
- Yeast variation: Instant yeast can be used as a substitute; add it directly to the dry ingredients to simplify.
- Kneading: If short on time, a stand mixer with a dough hook can knead the dough in 4-5 minutes, but hand kneading builds the best texture.
- Fermentation tricks: Longer, slow fermentation (cold fridge proofing) develops complex flavor and creates more crispy crust pockets.
- Shaping: avoid overworking the dough after fermentation; gentle handling preserves the trapped air bubbles essential for fluffiness.
- Storage: Dough can be refrigerated for up to 48 hours or frozen up to 2 weeks-just thaw completely before shaping.
Serving Suggestions
Serve your homemade pizza hot from the oven with a drizzle of gourmet extra virgin olive oil and a sprinkle of fresh basil or microgreens for vibrant color and fresh aroma. Pair with a chilled glass of sparkling water or your favorite Italian wine to amplify the experience. for an authentic touch, offer Parmesan shards or chili flakes on the side.

| Nutrient | Per Serving (1/2 pizza) |
|---|---|
| Calories | 320 |
| Protein | 10g |
| Carbohydrates | 58g |
| Fat | 6g |
Discover more about yeast science and gluten development in our detailed guide on artisan bread dough techniques. For cutting-edge food science insights on dough fermentation, the ScienceDaily fermentation article is a must-read.
Q&A
Q&A: Perfect Your Pie – The Ultimate Guide to Homemade pizza Dough
Q1: Why is homemade pizza dough worth the extra effort?
A1: Because the foundation is everything! Homemade dough brings an irresistible chew,a crispy yet tender crust,and a freshness store-bought versions just can’t match. Plus, it’s endlessly customizable – you control the flour, hydration, and fermentation to craft your perfect base.
Q2: What are the essential ingredients for a foolproof pizza dough?
A2: Flour, water, yeast, salt, and a touch of olive oil. The beauty lies in simplicity.High-quality ingredients amplify flavor and texture – and remember,the flour type can make a world of difference: bread flour for chewiness,all-purpose for versatility,or even ’00’ for that classic italian crisp.Q3: How crucial is yeast, and can I use alternatives?
A3: Yeast is the magic agent that makes dough rise and develop flavor. Active dry or instant yeast are most common and reliable.For a tangier, more complex crust, sourdough starter is a creative alternative – it requires patience but rewards you with a depth of flavor that’s uniquely yours.
Q4: What’s the secret to kneading dough correctly?
A4: Kneading isn’t just about mixing – it’s about building gluten, the network that gives dough elasticity and structure. Aim for a smooth, slightly tacky ball that springs back when pressed. Too little kneading leaves your crust dense; too much and you risk overworking it. Think of kneading as a gentle workout – rhythm and feel over brute force.
Q5: How long should I let my dough rise?
A5: Patience pays off here. A first rise of 1-2 hours at room temperature lets the yeast awaken. For deeper flavor and better texture, try a slow, cold fermentation in the fridge for 24 to 72 hours. This extended rise allows enzymes to break down starches into simple sugars, creating a crust that’s complex and slightly sweet.
Q6: Can I freeze pizza dough?
A6: Absolutely! After the initial rise, portion your dough into balls, wrap tightly, and freeze. When you’re ready to bake, thaw overnight in the fridge before letting it come to room temperature and rise a bit more. Freezing is a fantastic way to have fresh dough on demand without sacrificing quality.
Q7: How do I avoid a soggy center on my pizza?
A7: Several tricks: stretch your dough thin but not paper-thin, preheat your oven (and pizza stone if you have one) to scorch-hot temperatures (450-500°F / 230-260°C), and don’t overload your pie with wet toppings.Also, a speedy pre-bake or par-bake can firm the crust before adding toppings.
Q8: Is hand-stretching better then rolling the dough?
A8: Most purists swear by hand-stretching – it preserves the air bubbles that make crust light and airy, whereas a rolling pin can flatten these out, resulting in a denser crust. Plus, hand-stretching gives you more tactile feedback to avoid tearing. it’s a bit of a skill, but practice makes perfect!
Q9: What’s the ideal hydration level for pizza dough?
A9: Hydration – the ratio of water to flour – typically ranges from 60% to 70%. Higher hydration doughs produce lighter, more open crumb structures but can be stickier and trickier to handle. Beginners might start around 60% and experiment upwards as confidence grows.
Q10: Any final tips for elevating homemade pizza dough?
A10: Embrace experimentation. Try adding herbs, a pinch of sugar for browning, or infused oils. Use a pizza stone or steel for blistering heat transfer. And above all, enjoy the process – each batch is a flavorful step closer to your perfect pie masterpiece!
Future Outlook
With your hands now dusted in flour and your spirit fired up like a wood-fired oven, you’re more than ready to craft pizza dough that’s nothing short of perfection. Remember, the journey to the perfect pie is as much about patience and practice as it is about precise ingredients and technique. whether you prefer a chewy Neapolitan crust, a crispy thin base, or a thick, fluffy Sicilian style, the secrets you’ve uncovered here unlock endless possibilities. So, roll up your sleeves, embrace the art of dough-making, and let every homemade pizza you create be a delicious testament to your newfound skills. Your perfect pie awaits-dive in, bake boldly, and savor every slice!