When life gives you lemons, why not turn them into something irresistibly zesty and sweet? welcome to your ultimate guide to crafting lemon bars that perfectly balance tangy brightness with buttery richness. Whether you’re a seasoned baker or a curious kitchen adventurer, this article will help you master the art of lemon bars-from creating that delicate shortbread crust to achieving the ideal citrusy filling that makes every bite a burst of sunshine. Get ready to elevate your dessert game and bring a little zest to your next treat!
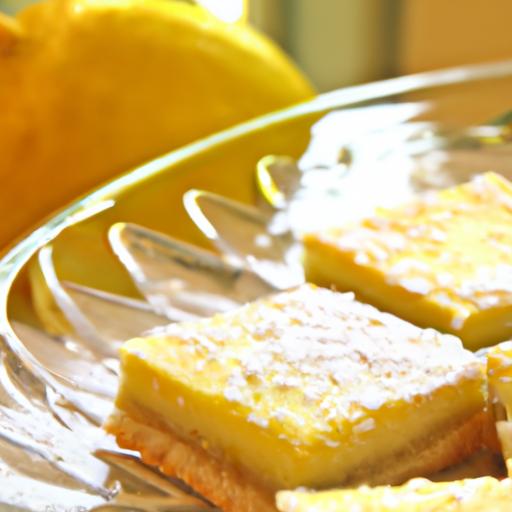
Zesty Lemon Bars bring sunshine to any table, with their radiant, tangy lemon filling nestled atop a perfectly buttery crust. This timeless treat, rooted in California’s sunny bakeries, delights with its balance of bold citrus flavor and delicate crumb. Discover the secrets to selecting the juiciest lemons and crafting a crust that melts in your mouth, making every bite a harmonious dance of tartness and richness.
Prep and Cook Time
- Preparation: 20 minutes
- Chilling: 30 minutes
- Baking: 30-35 minutes
- Total Time: Approximately 1 hour 25 minutes
Yield
Makes 16 classic square servings, perfect for sharing or an indulgent afternoon treat.
Difficulty Level
Easy to Medium – Ideal for keen home bakers ready to impress with minimal fuss.
Ingredients
- For the Crust:
- 1 cup (125g) all-purpose flour, sifted
- 1/3 cup (75g) unsalted butter, cold and cubed
- 1/4 cup (50g) granulated sugar
- 1/8 tsp salt
- For the Lemon Filling:
- 3 large fresh lemons (zested and juiced)
- 1 1/4 cups (250g) granulated sugar
- 3 large eggs
- 2 tbsp all-purpose flour
- Powdered sugar, for dusting (optional)
instructions
- Choose and Prepare Your Lemons: Select firm lemons heavy for their size with smooth skin to ensure maximum juice and zest. Wash thoroughly and zest 2 teaspoons,avoiding the bitter white pith.Juice to yield about 1/2 cup of fresh lemon juice. Pro Tip: Rolling lemons on the counter before juicing eases extraction.
- make the Buttery Crust: Combine the sifted flour, sugar, and salt in a mixing bowl. Using a pastry cutter or fingertips, cut in the cold butter until the mixture resembles coarse crumbs. Press evenly into an 8×8-inch (20×20 cm) baking pan lined with parchment paper. Chill for 30 minutes to firm up-this step helps the crust stay tender and flaky.
- Bake the Crust: Preheat your oven to 350°F (175°C). Bake the chilled crust for 18-20 minutes or until lightly golden at the edges. Remove and let cool slightly to prepare for the topping.
- Prepare the Lemon Filling: Whisk together sugar and flour until combined. beat in the eggs, then gradually stir in the fresh lemon juice and zest. Pour the vibrant mixture over the warm crust, smoothing the top with a spatula.
- Bake to Perfection: Return the pan to the oven and bake for an additional 20-25 minutes, until the filling is just set but still yields a slight jiggle when gently shaken. This ensures a luscious, silky texture.
- Cool and Chill: Let the bars cool to room temperature, then refrigerate for at least 2 hours. Chilling sharpens the flavors and makes cutting cleaner.
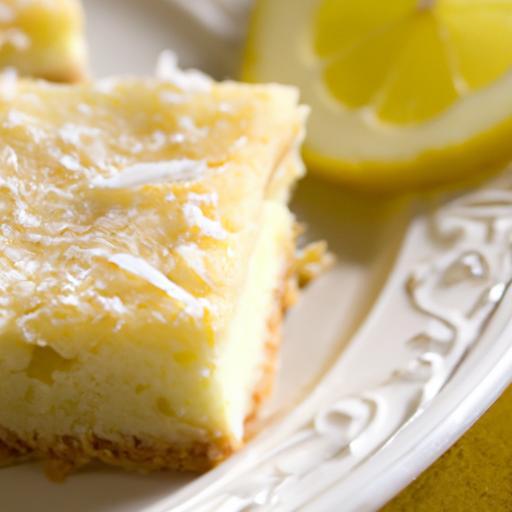
- Serve: Dust with powdered sugar and slice into squares using a knife dipped in hot water for clean cuts. Garnish with thin lemon slices or fresh mint for a refreshing touch.
Tips for Success
- Variations: Swap part of the all-purpose flour in the crust for almond flour for a nutty dimension. Or sprinkle toasted coconut atop before the final bake for tropical flair.
- Substitutions: Use light brown sugar in the crust for deeper caramel notes, or honey in the filling to soften acidity.
- Troubleshooting: If your filling cracks or separates, avoid overbaking and ensure eggs are room temperature for even blending. Let the bars chill thoroughly before slicing to maintain structural integrity.
- Make-Ahead: Lemon bars store beautifully covered in the fridge for up to 4 days and freeze well for up to 1 month. Thaw overnight and dust with powdered sugar before serving.
Serving Suggestions
Present your zesty lemon bars on a rustic wooden board or white ceramic platter to highlight their sunny hue. For added elegance, garnish each square with edible flowers, a sprig of fresh thyme, or finely grated lemon zest. Pair with a cup of Earl Gray tea or sparkling lemonade for a perfectly balanced treat.
Nutritional Information
| Per Serving | Calories | Protein | Carbs | Fat |
|---|---|---|---|---|
| Lemon Bar | 190 | 3g | 28g | 7g |

For an in-depth guide on zesting and juicing citrus fruits, visit Serious Eats – Lemon Juice Extraction. To explore other citrus-inspired desserts, check out our citrus dessert Recipes section.
Q&A
Q&A: Zesty Lemon Bars – Your Ultimate Tangy Treat Recipe Guide
Q1: What makes lemon bars the ultimate tangy treat?
A1: Lemon bars strike the perfect balance between bright,zesty citrus and buttery,sweet goodness. Their vibrant lemon flavor wakes up your taste buds, while the tender, crumbly crust provides a heavenly contrast-making each bite irresistibly refreshing and indulgent.
Q2: What are the key ingredients for making perfect lemon bars?
A2: The magic trio includes fresh lemons (for that zingy punch),powdered sugar (to sweeten without overpowering),and butter (to create a rich,flaky crust). High-quality eggs and a dash of vanilla extract also help achieve that smooth,custardy filling that melts in your mouth.
Q3: Can I use bottled lemon juice rather of fresh lemons?
A3: While bottled lemon juice can work in a pinch, fresh lemons are highly recommended. They offer brighter, more complex flavors and a natural zing that bottled juice lacks. Plus, zesting fresh lemons adds an extra layer of aromatic brilliance to your bars.
Q4: How do I get the crust just right-crumbly but sturdy?
A4: The secret lies in keeping your butter cold until mixing, then gently pulsing the dry ingredients with the butter until pea-sized crumbs form. Pressing the mixture firmly into the pan before baking ensures a crust that holds together but still crumbles delightfully on your tongue.Q5: How long should lemon bars be chilled before serving?
A5: Patience is a virtue! Chilling your lemon bars for at least 2 hours-or better yet, overnight-helps the filling set properly. This cooling step allows flavors to meld and texture to firm up, resulting in clean slices and a luscious, melt-in-your-mouth experience.
Q6: Can lemon bars be customized?
A6: Absolutely! Add a sprinkle of poppy seeds for a subtle crunch, a dash of fresh thyme for herbal complexity, or a swirl of raspberry puree for added fruity flair. They’re a versatile canvas perfect for your tangy creativity.
Q7: What’s the best way to store leftover lemon bars?
A7: Keep them chilled in an airtight container.Stored in the fridge, lemon bars stay fresh and zesty for up to 4 days. You can also freeze them for longer storage-just thaw overnight in the fridge before indulging again.
Q8: Are lemon bars suitable for special diets?
A8: Conventional lemon bars contain gluten and dairy, but with a few tweaks, they can be adapted! Use gluten-free flour blends for the crust and coconut oil or dairy-free butter substitutes to accommodate various dietary needs-without sacrificing that signature tang.
Embrace the zing and get ready to make your kitchen smell like sunshine-lemon bars are more than dessert, they’re a slice of happiness!
in Conclusion
Whether you’re craving a burst of citrus sunshine or searching for the perfect balance between sweet and tangy, these zesty lemon bars deliver a slice of pure delight every time. With their buttery crust and vibrant lemon filling, they’re more than just a dessert-they’re an invitation to brighten your day with each bite.Armed with this ultimate tangy treat recipe guide, you’re ready to whip up a batch that’ll impress family, friends, and even your most discerning sweet tooth. So go ahead, dive into the zest, and let these lemon bars become your new favorite way to savor that unforgettable lemony zing.