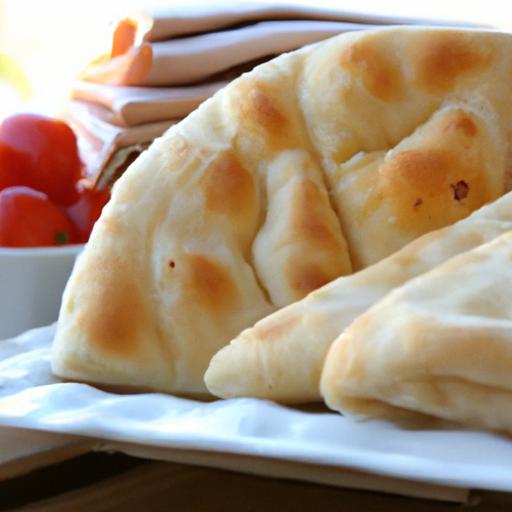
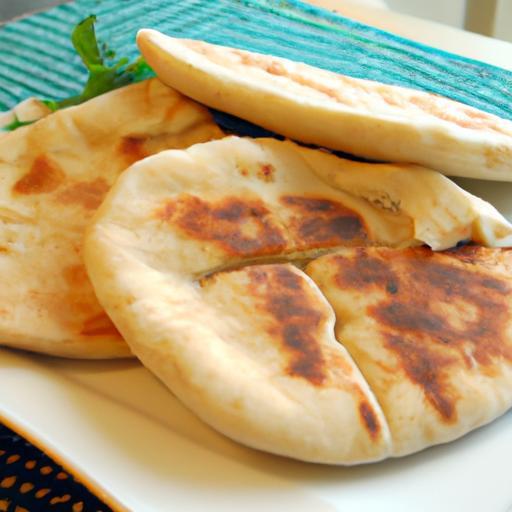
There’s something undeniably magical about tearing into a warm, fluffy pita pocket fresh from the oven-it’s light, tender walls just waiting to be filled with your favorite ingredients. Whether stuffed with vibrant veggies, savory meats, or creamy spreads, the humble pita is a culinary chameleon, versatile and endlessly satisfying. But why settle for store-bought when you can master the art of perfect pocket pita right at home? In this guide, we’ll walk you through an easy, foolproof recipe that transforms simple ingredients into soft, pillowy pockets bursting with homemade goodness. Get ready to elevate your bread game and discover the joy of baking pita bread that’s as delightful to make as it is indeed to eat.
perfect Pocket Pita: Easy Homemade Bread Recipe Guide
perfect Pocket Pita begins with a captivating marriage of science and culinary tradition, resulting in that signature pocket puff beloved across Mediterranean and Middle Eastern cuisines. The secret lies in the simple ingredients and a perfect balance of heat and steam that coax each soft, pillowy pita to rise and create the perfect pocket for your favorite fillings. As someone who’s styled countless loaves and baked innumerable batches, I’m excited to share how you can master this timeless bread right in your kitchen.
Prep and Cook Time
- Preparation: 20 minutes
- Dough rising: 1 hour 30 minutes
- Baking: 15 minutes
- Total Time: Approximately 2 hours
Yield
Makes 8 medium-sized pocket pitas,perfect for 4-6 servings depending on appetite.
Difficulty Level
Easy to Medium: Ideal for beginners eager to explore homemade bread baking, with simple steps and reliable results.
Ingredients
- 3 cups all-purpose flour, sifted
- 1 ½ teaspoons active dry yeast
- 1 teaspoon sugar
- 1 teaspoon fine sea salt
- 1 ¼ cups warm water (105°F to 110°F)
- 2 tablespoons extra virgin olive oil
- Optional: 1 teaspoon garlic powder or za’atar for flavor variation
Instructions
- Activate the yeast: in a small bowl, dissolve the sugar in warm water, then sprinkle the yeast over and let it sit for 5-7 minutes until frothy, signalling active yeast.
- Mix dry ingredients: in a large mixing bowl, whisk together the sifted flour and salt evenly, ensuring no lumps.
- Form the dough: Make a well in the flour and pour in the yeast mixture and olive oil. Stir gently using a wooden spoon until all flour is incorporated.
- Knead until smooth: Transfer dough to a lightly floured surface and knead vigorously for about 8-10 minutes, until the dough is elastic and slightly sticky. this develops the gluten structure essential for airy pockets.
- First rise: Shape the dough into a ball and place it in a lightly oiled bowl, covered with a damp cloth or plastic wrap.Let it rise in a warm, draft-free spot for 1 hour or until doubled in size.
- Divide and rest: Punch down the risen dough and divide it into 8 equal portions. Roll each into a smooth ball and let rest for 10 minutes under a cloth to relax the gluten, making rolling easier.
- Roll out the pitas: On a floured surface, roll each ball into a circle approximately 6-7 inches in diameter and ¼ inch thick. Uniform thickness ensures even baking and pocket formation.
- Preheat the oven and baking surface: Place a heavy-duty baking stone or inverted baking sheet on the middle rack and preheat the oven to 475°F (245°C) for at least 30 minutes. The intense heat is crucial for rapid puffing.
- Bake the pitas: Quickly transfer 2-3 pitas onto the hot baking surface (using a peel or parchment paper). Bake for 3-4 minutes until puffed and lightly golden. Flip halfway if needed to brown evenly.
- Cool and store: Remove the baked pitas and cover them immediately with a clean kitchen towel to retain softness. Repeat with the remaining dough. Store cooled pitas in airtight bags to keep them moist or freeze for longer storage.
Chef’s Notes: Tips for Success with Perfect Pocket Pita
- Flour type: While all-purpose flour works well,experimenting with bread flour increases gluten content and yields chewier pockets.
- Temperature control: the water temperature for yeast activation is critical-too hot kills yeast,too cold slows it down. Aim for warm, not hot.
- rest time is key: Allowing dough balls to rest before rolling avoids elasticity springing back, making your pitas easier to shape.
- Adjust oven heat: If pitas don’t puff up, your oven or baking surface may not be hot enough; ensure preheating is thorough.
- Make-ahead tip: Pita dough can be refrigerated overnight; bring to room temperature before shaping.
- Variation: Add fresh herbs or spices into the dough for customized flavor.
Serving Suggestions
Perfect Pocket Pita is a versatile canvas. Fill it with grilled chicken,crisp veggies,and tangy tzatziki for an authentic gyro experience. For a vegetarian option, stuffed with roasted eggplant, hummus, and fresh parsley, it bursts with flavor. Garnish with a sprinkle of sumac or a drizzle of preserved lemon vinaigrette to elevate presentation. Serve warm for maximal softness, accompanied by a side of tabbouleh or fattoush salad to complete your feast.

| Nutrient | Per Pita (Approx.) |
|---|---|
| calories | 140 kcal |
| Protein | 5 g |
| Carbohydrates | 28 g |
| Fat | 2 g |
Discover more about Mediterranean breads and their cultural richness by visiting Serious Eats on Mediterranean breads.For additional bread-baking techniques,see our Homemade Flatbread Recipes guide to expand your baking repertoire.
Q&A
Q&A: Perfect Pocket Pita - Your Easy Homemade Bread Recipe Guide
Q1: What makes the “Perfect Pocket Pita” diffrent from regular pita bread?
A1: The “perfect Pocket pita” is crafted to achieve that signature hollow pocket every time – a little edible envelope ready to be stuffed with your favorite fillings. Unlike some flatbreads that are dense or doughy, this recipe balances softness with structure, creating bread that’s both pillowy and sturdy.
Q2: How hard is it to make pita bread at home? Do I need special ingredients or equipment?
A2: Making pita at home is surprisingly simple and doesn’t require fancy gear. Basic pantry staples like flour, yeast, water, salt, and a pinch of sugar will do. While a pizza stone or cast-iron skillet can help replicate the oven’s high heat for puffing, a regular baking sheet or even a heavy pan will get the job done.
Q3: What’s the secret behind getting that perfect pocket inside the pita?
A3: The magic lies in how you roll and bake the dough. Rolling the dough balls evenly and thinly, then baking at a high temperature, causes steam to rapidly expand inside, puffing up the bread and creating a pocket.Speedy oven heat and timing are essential-too low or slow, and the pocket won’t fully form.
Q4: Can I make this recipe gluten-free or with whole wheat flour?
A4: Absolutely! While customary pita uses white all-purpose flour for a tender crumb, whole wheat adds nuttiness and more fiber. Just be aware whole wheat can make the dough a bit denser, so adding a touch more water or letting it rest longer helps. Gluten-free flours need blends designed for bread baking, with xanthan gum sometimes added to mimic elasticity.Q5: How should I store leftover pita bread to keep it fresh?
A5: Pita is best enjoyed fresh, but leftovers can be kept in an airtight container or zip-top bag at room temperature for up to two days. For longer storage,freeze them in a sealed bag and toast or warm straight from the freezer-just wrap in a damp towel and microwave briefly or heat in the oven.
Q6: Any tips for stuffing and serving pocket pita?
A6: The pocket pita is a canvas for creativity. Fill it with falafel and hummus for a Middle Eastern vibe,grilled chicken and tzatziki for Greek flair,or roasted veggies and feta for a vegetarian delight. Lightly warm the pita before stuffing to keep it pliable, and don’t overfill-the pocket should gently hold your ingredients.
With the Perfect Pocket Pita in your culinary toolkit, homemade sandwiches, wraps, and snacks reach a whole new level of deliciousness!
Insights and Conclusions
There you have it-the secret behind that flawless pocket pita, fresh from your own kitchen. with just a handful of simple ingredients and a little love, you can create bread that’s not only tasty but also endlessly versatile. Whether you’re stuffing it with your favorite fillings or using it to scoop up vibrant dips, mastering this easy homemade bread recipe opens a world of culinary possibilities. So next time hunger strikes, remember: perfect pocket pita is always within your reach, ready to elevate any meal with its warm, pillowy embrace. Happy baking!