There’s something undeniably comforting about biting into a warm, flaky Pop-Tart straight from the toaster-a nostalgic treat that has delighted generations with it’s sweet filling and crisp pastry shell. But what if you could elevate this classic snack to a whole new level,customizing flavors,fillings,and decorations in your very own kitchen? Welcome to the world of tasty DIY Pop-Tarts,where creativity meets simplicity to transform an everyday convenience into a homemade masterpiece. In this guide, we’ll explore everything you need to no to craft your own tasty treats, from perfecting the pastry dough to mixing luscious fillings and adding that extra pop of personality. Get ready to roll up your sleeves and embark on a baking adventure that’s as fun as it is indeed flavorful!
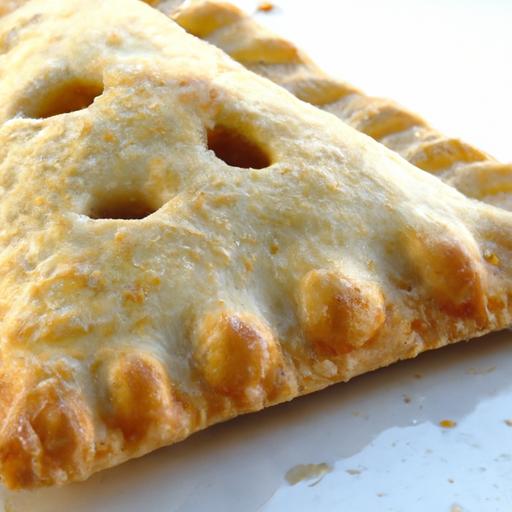
Delicious DIY Pop-Tarts start with choosing the perfect dough that guarantees a flaky, buttery crust, which is the foundation of these nostalgic treats. Achieving that tender crunch while maintaining an inviting golden hue means selecting a dough rich in butter but easy to work with, reflecting the homemade charm that makes these pastries so special.
Prep and Cook Time
- Planning: 25 minutes
- Chilling: 30 minutes
- Baking: 20 minutes
- Total: Approximately 1 hour 15 minutes
Yield
Makes about 8 homemade pop-tarts
Difficulty Level
Medium – Beginners can succeed with patience and careful attention to sealing and baking steps.
Ingredients
- 2 ½ cups all-purpose flour, sifted
- 1 tbsp granulated sugar
- ½ tsp salt
- 1 cup (2 sticks) unsalted butter, cold and cut into cubes
- ⅓ cup ice-cold water (plus extra if needed)
- 1 large egg, beaten (for egg wash)
- ½ cup of filling of your choice (jam, Nutella, fruit preserves, or a savory option)
- 1 cup powdered sugar (for frosting)
- 2 tbsp milk or cream (for frosting consistency)
- Food coloring or sprinkles for decoration (optional)
Instructions
- Prepare the Dough: Combine flour, sugar, and salt in a large bowl. Add the cold butter cubes and use a pastry cutter or your fingertips to rub the butter into the flour until the mixture resembles coarse crumbs with some pea-sized pieces remaining.
- Add Ice Water: Gradually pour in the ice-cold water, mixing gently with a fork until the dough just comes together.Add a splash more water if the dough feels too dry, one teaspoon at a time.
- Chill the Dough: Turn the dough out onto a floured surface, press into a disk, wrap tightly in plastic wrap, and refrigerate for at least 30 minutes - chilled dough ensures optimal flakiness and ease when rolling out.
- Roll and Cut: On a lightly floured surface, roll the dough out to about ⅛ inch thickness. Cut into rectangles roughly 3×4 inches using a sharp knife or a pizza cutter.
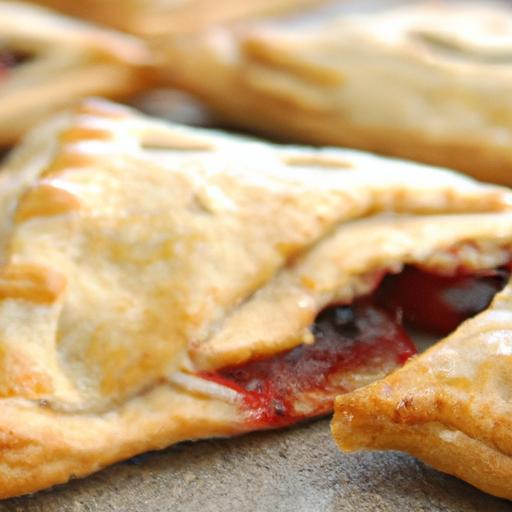
- Add Filling: Place a tablespoon of your chosen filling in the center of half the rectangles,leaving at least a ¼ inch border all around to seal.
- Seal the Pop-Tarts: Brush the edges with beaten egg, then carefully top with the remaining rectangles. Press edges with a fork to crimp and ensure a secure seal to prevent leaks during baking.
- Egg Wash: Lightly brush the tops with the remaining beaten egg for that golden finish.
- Bake: Position pop-tarts on a parchment-lined baking sheet. Bake in a preheated oven at 375°F (190°C) for 18-20 minutes or until golden and puffed.
- Prepare Frosting: Whisk powdered sugar with milk or cream until smooth and slightly thick but pourable. Add food coloring if desired for festive flair.
- Decorate: Once the pop-tarts are cooled completely (about 15 minutes), spread or pipe frosting over the tops. To elevate presentation, scatter sprinkles or edible glitter for a magical finish.
Chef’s Tips for Mastering Delicious DIY Pop-Tarts
- For a truly flaky crust, keep all your ingredients cold-especially the butter and water. Avoid overworking the dough to prevent toughness.
- Don’t overload with filling; too much can cause the pastry to burst open during baking.
- For unique flavor inspirations, try fillings like salted caramel apple, raspberry cream cheese, or even a savory goat cheese and herb blend.
- Seal edges firmly using a fork or by pinching; consider lightly crimping twice for an extra secure seal.
- Make ahead tip: Assemble pop-tarts and freeze them before baking for up to 1 month. Bake directly from frozen, adding a few extra minutes to the baking time.
Serving suggestions to Impress Your Guests
Serve these pop-tarts warm or at room temperature alongside a dollop of whipped cream or a scoop of vanilla bean ice cream for an indulgent treat. Garnish with fresh berries or edible flowers for an elegant touch. Pair with a steaming cup of chai or rich hot chocolate to complement the buttery, flaky textures and sweet fillings.
| Nutritional Info (per tart) | Calories | Protein | Carbs | Fat |
|---|---|---|---|---|
| Average | 280 | 4g | 35g | 13g |
Learn more about perfect pastry dough techniques and to master your baking skills. For additional baking science and inspiration, visit king Arthur Baking Company’s official pop-tart recipe.

Q&A
Q&A: Delicious DIY pop-Tarts - A Tasty Homemade Treat Guide
Q1: What makes DIY Pop-Tarts so special compared to store-bought ones?
A1: Homemade Pop-Tarts offer a world of creative freedom! You control the ingredients, flavors, and textures-no preservatives or artificial additives, just pure tasty goodness crafted to your liking. Plus, baking them yourself fills your kitchen with an irresistible aroma that’s half the fun!
Q2: Where do I start if I want to make my own pop-Tarts from scratch?
A2: Begin with a simple, flaky pastry dough-think buttery and tender, like pie crust. Then pick a filling that excites your taste buds, whether it’s classic strawberry jam, chocolate hazelnut spread, or an adventurous combo like peach with cinnamon. Roll out the dough, cut into rectangles, fill, seal, and bake!
Q3: Can I make my DIY Pop-Tarts gluten-free or vegan?
A3: Absolutely! For gluten-free, swap regular flour with an all-purpose gluten-free blend and add a little xanthan gum for structure. Vegan dough can be achieved by using plant-based butter and a flaxseed or chia seed egg substitute. Your homemade Pop-Tarts can be tailored to fit any dietary need!
Q4: How do I get that perfect golden crust without soggy bottoms?
A4: A light brushing of egg wash (or plant-based milk for vegan options) on the pastry before baking creates a beautiful golden sheen. To avoid sogginess, don’t overfill your tarts-use just enough filling to leave room for sealing. Baking on a parchment-lined sheet ensures even heat circulation and crispness.
Q5: Are there fun ways to decorate my Pop-Tarts?
A5: Absolutely! After baking, drizzle them with homemade glaze, sprinkle with colorful sprinkles, or even pipe some royal icing designs on top. You can experiment with edible glitter or crushed nuts for extra pizzazz. Decorating your treats is a great way to personalize them for parties or gifts.
Q6: How long can I store homemade Pop-Tarts, and how do I reheat them?
A6: Keep your DIY Pop-Tarts in an airtight container at room temperature for up to 3 days, or freeze them for up to a month. To enjoy warm, pop them in a toaster or oven for a few minutes-voilà, freshly baked taste as if they just came out of the oven!
Q7: Got any flavor inspiration for adventurous Pop-Tart makers?
A7: Think beyond the classic! Try mango with chili powder for a sweet-spicy kick, maple bacon for a savory twist, or lemon curd with poppy seeds for citrusy brightness. Let your inventiveness run wild-your homemade Pop-Tarts can be as adventurous as your palate!
Dive into your kitchen and let these delicious DIY Pop-Tarts bring a homemade touch to your morning routines and snack times. Remember: baking is half science, half magic, and all about joy!
Wrapping Up
Whether you’re craving a nostalgic breakfast or a sweet snack with a personal twist, making your own Pop-Tarts opens a world of endless flavor possibilities. With just a handful of ingredients and a dash of creativity, you can craft these flaky, golden pockets filled with your favorite jams, creams, or even unexpected surprises. so, roll up your sleeves, preheat that oven, and embark on your DIY Pop-Tart adventure-becuase sometimes, the best treats are the ones you make yourself. Happy baking and even happier tasting!